Thứ Hai, 30 tháng 11, 2015

WiX - Icon for shortcut

In this post, I will talk about adding icon for shortcut.

Suppose that, I have a .ico file, named hand.ico. I will use this file to represent for Desktop shortcut and Start Menu shortcut.

1. Add icon for Desktop shortcut.

In the Product.wxs file, find lines of code that say:
<Shortcut Id="ApplicationDesktopShortcut"
Name="AutoClick_FirstBlood"
Target="[INSTALLFOLDER]AutoClick_FirstBlood.exe"
WorkingDirectory="INSTALLFOLDER" />
Replace it with the following lines of code:
<Shortcut Id="ApplicationDesktopShortcut"
Name="AutoClick_FirstBlood"
Target="[INSTALLFOLDER]AutoClick_FirstBlood.exe"
WorkingDirectory="INSTALLFOLDER"
Icon="handIcon1">
<Icon Id="handIcon1" SourceFile="C:\FilesToAdd\icon\hand.ico"/>
</Shortcut>

 2. Add icon for Start Menu shortcut

In the Product.wxs file, find lines of code that say:
<Shortcut Id="ApplicationStartMenuShortcut"
Name="AutoClick_FirstBlood"
Description="AutoClick_FirstBlood - an simple application about mouse events."
Target="[INSTALLFOLDER]AutoClick_FirstBlood.exe"
WorkingDirectory="INSTALLFOLDER" />
Replace it with the following lines of code:
<Shortcut Id="ApplicationStartMenuShortcut"
Name="AutoClick_FirstBlood"
Description="AutoClick_FirstBlood - an simple application about mouse events."
Target="[INSTALLFOLDER]AutoClick_FirstBlood.exe"
WorkingDirectory="INSTALLFOLDER"
Icon="handIcon2">
<Icon Id="handIcon2" SourceFile="C:\FilesToAdd\icon\hand.ico"/>
</Shortcut>

3. Rebuild the WiX project. 

Thứ Tư, 25 tháng 11, 2015

WiX- copy files or directory to install folder

In this post, I will talk about copying some files or directory to install folder.

I. Copy some files to install folder

Example, I have 2 files: readme.txt, config.xml. I will copy these files to the install folder.

1. Add new components that contain the sample files.
In the Product.wxs file, find lines of code that say:
<Fragment>
<ComponentGroup Id="ProductComponents" Directory="INSTALLFOLDER">
<Component Id="ProductComponent">
<File Source="$(var.AutoClick_FirstBlood.TargetPath)" />
</Component>
</ComponentGroup>
</Fragment>
Replace it with the following lines of code:
<Fragment>
<ComponentGroup Id="ProductComponents" Directory="INSTALLFOLDER">
<Component Id="ProductComponent">
<File Source="$(var.AutoClick_FirstBlood.TargetPath)" />
</Component>
<Component Id="txtFile_Component" Guid="1A4C52F3-B0D3-40BE-8667-FF534E16C5B7">
<File Id="txtFile_File" Source="C:\FilesToAdd\readme.txt" KeyPath="yes" />
</Component>
<Component Id="xmlFile_Component" Guid="1B27DDFD-8B4E-4E12-874A-DA7E4F3BE3A8">
<File Id="xmlFile_File" Source="C:\FilesToAdd\config.xml" KeyPath="yes" />
</Component>
</ComponentGroup>
</Fragment>

2. Rebuild the WiX project.

II. Copy some directories and files to install folder

Suppose that I have folders, sub-folders and files as below:
  • C:\FilesToAdd\readme.txt
  • C:\FilesToAdd\config\config_common.xml
  • C:\FilesToAdd\config\hotkey\config_hotkey.xml


And now, I will copy them to install folder.

1. Define the directory structure.
In the Product.wxs file, find lines of code that say:
<Directory Id="ProgramFilesFolder">
<Directory Id="INSTALLFOLDER" Name="AutoClick_FirstBlood" />
</Directory>
Replace it with following lines of code:
<Directory Id="ProgramFilesFolder">
<Directory Id="INSTALLFOLDER" Name="AutoClick_FirstBlood">
<Directory Id="Config_Folder" Name="config">
<Directory Id="Hotkey_Folder" Name="hotkey" />
</Directory>
</Directory>
</Directory>

2. Add new components that contain the sample files.
In the Product.wxs file, find lines of code that say:
<ComponentGroup Id="ProductComponents" Directory="INSTALLFOLDER">
<Component Id="ProductComponent">
<File Source="$(var.AutoClick_FirstBlood.TargetPath)" />
</Component>
</ComponentGroup>
Replace it with following lines of code:
<Fragment>
<ComponentGroup Id="ProductComponents" Directory="INSTALLFOLDER">
<Component Id="ProductComponent">
<File Source="$(var.AutoClick_FirstBlood.TargetPath)" />
</Component>
<Component Id="readme_Component" Guid="1A4C52F3-B0D3-40BE-8667-FF534E16C5B7">
<File Id="readme_File" Source="C:\FilesToAdd\readme.txt" KeyPath="yes" />
</Component>
</ComponentGroup>
<DirectoryRef Id="config_Folder">
<Component Id="config_common_Component" Guid="1B27DDFD-8B4E-4E12-874A-DA7E4F3BE3A8">
<File Id="config_common_File"
Source="C:\FilesToAdd\config\config_common.xml" />
</Component>
</DirectoryRef>
<DirectoryRef Id="hotkey_Folder">
<Component Id="config_hotkey_Component" Guid="5A86C120-7C0E-42D5-A357-D75B2E145D4A">
<File Id="config_hotkey_File"
Source="C:\FilesToAdd\config\hotkey\config_hotkey.xml" />
</Component>
</DirectoryRef>
</Fragment>


3. Add componentRef's for config_common file and config_hotkey file.
We need to add componentRef's for config_common file and config_hotkey file under Feature element.
In the Product.wxs file, find lines of code that say:
<Feature Id="ProductFeature" Title="AutoClick_FirstBlood" Level="1"> <ComponentGroupRef Id="ProductComponents" /> <ComponentRef Id="App_Desktop_Shortcut"/> <ComponentRef Id="App_Start_Menu_Shortcut"/></Feature>
Replace it with following lines of code that say:
<Feature Id="ProductFeature" Title="AutoClick_FirstBlood" Level="1">
<ComponentGroupRef Id="ProductComponents" />
<ComponentRef Id="App_Desktop_Shortcut"/>
<ComponentRef Id="App_Start_Menu_Shortcut"/>
<ComponentRef Id="config_common_Component"/>
<ComponentRef Id="config_hotkey_Component"/>
</Feature>

4. Rebuild the WiX project.

WiX - create Desktop shortcut and Start Menu shortcut

In this post, I will talk about creating Desktop shortcut and Start Menu shortcut.

1. Add componentRef's for Desktop shortcut and Start Menu shortcut

We need to add componentRef's for Desktop shortcut and Start Menu shortcut under Feature element.
In the Product.wxs file, find line of code that says:
 <Feature Id="ProductFeature" Title="AutoClick_FirstBlood" Level="1">
<ComponentGroupRef Id="ProductComponents" />
</Feature>
Replace it the following lines of code:
<Feature Id="ProductFeature" Title="AutoClick_FirstBlood" Level="1">
<ComponentGroupRef Id="ProductComponents" />
<ComponentRef Id="App_Desktop_Shortcut"/>
<ComponentRef Id="App_Start_Menu_Shortcut"/>
</Feature> 


2. Add directories of two folders using DesktopFolder and ProgramMenuFolder keywords.

In the Product.wxs file, find line of code that says:
<Directory Id="TARGETDIR" Name="SourceDir">
<Directory Id="ProgramFilesFolder">
<Directory Id="INSTALLFOLDER" Name="AutoClick_FirstBlood" />
</Directory>
</Directory>
Replace it with following lines of code:
<Directory Id="TARGETDIR" Name="SourceDir">
<Directory Id="ProgramFilesFolder">
<Directory Id="INSTALLFOLDER" Name="AutoClick_FirstBlood" />
</Directory>
<Directory Id="DesktopFolder" Name="Desktop"> </Directory>
<Directory Id="ProgramMenuFolder">
<Directory Id="ApplicationProgramsFolder" Name="AutoClick_FirstBlood" />
</Directory>
</Directory> 


3. Add shortcut component under directory reference.

In the Product.wxs file, add new some following lines of code:
<Fragment>
<DirectoryRef Id="DesktopFolder">
<Component Id="App_Desktop_Shortcut" Guid="327629B4-3339-432B-A574-6D9CB7DF8C8C">
<Shortcut Id="ApplicationDesktopShortcut"
Name="AutoClick_FirstBlood"
Target="[INSTALLFOLDER]AutoClick_FirstBlood.exe"
WorkingDirectory="INSTALLFOLDER" />
<RemoveFolder Id="RemoveDesktopFolder"
Directory="DesktopFolder"
On="uninstall" />
<RegistryValue Root="HKCU" Key="Software\AutoClick_FirstBlood"
Name="installed" Type="integer"
Value="1" KeyPath="yes" />
</Component>
</DirectoryRef>
<DirectoryRef Id="ApplicationProgramsFolder">
<Component Id="App_Start_Menu_Shortcut" Guid="0CAFCDBE-99AE-4656-BFE7-98FB02307D02">
<Shortcut Id="ApplicationStartMenuShortcut"
Name="AutoClick_FirstBlood"
Description="AutoClick_FirstBlood - an simple application about mouse events."
Target="[INSTALLFOLDER]AutoClick_FirstBlood.exe"
WorkingDirectory="INSTALLFOLDER" />
<RemoveFolder Id="RemoveApplicationProgramsFolder"
Directory="ApplicationProgramsFolder"
On="uninstall" />
<RegistryValue Root="HKCU" Key="Software\AutoClick_FirstBlood"
Name="installed" Type="integer"
Value="1" KeyPath="yes" />
   
</Component>
</DirectoryRef>
</Fragment>
Add shortcut components(Image 1)
Add shortcut components(Image 2)
**Note about Guid:
We need to generate a unique Guid for each Component.
A Guid has generated by Visual Studio as below:

  • Select ToolCreate GUID

  • Click New GUID, then click Copy


4. Rebuild the WiX project.

Previous    Next

Thứ Ba, 24 tháng 11, 2015

WiX - single MSI instead of MSI +Cab

In this post, I will talk about adding Cabs into MSI file.

1. In the Product.wxs file, find the line of code that says:
<MediaTemplate />
Replace it with the following line of code:
<MediaTemplate EmbedCab="yes"/>


2. Rebuild the WiX project.
Previous    Next

Thứ Hai, 23 tháng 11, 2015

Creating a Simple Setup with WiX toolset

In this post, I follow this link: http://wixtoolset.org/documentation/manual/v3/votive/authoring_first_votive_project.html

I. Step 1: Create the C# Windows Form Application

I've got a Windows Form application, this is AutoClick_FirstBlood application. This application show as image below:

AutoClick_FirstBlood project

II. Step 2: Create installer for the application

1. Right click on the Solution 'AutoClick_FirstBlood', then click Add, then click New Project.


2. Choose the Windows Installer XML node in the Project types tree, then select Setup Project. Name the project "AutoClick_FirstBlood_Installer" and press OK.


3. In the AutoClick_FirstBlood_Installer project, right click on the References node and choose Add Reference...


4. Navigate to the Projects tab, click on the AutoClick_FirstBlood project, and click Add button, and then press OK.


5. In the Product.wxs file, find the comment that says:
<!-- <Component Id="ProductComponent"> -->
<!-- TODO: Insert files, registry keys, and other resources here. -->
<!-- </Component> -->
Delete that lines and replace it with the following lines of code:
<Component Id="ProductComponent">
<File Source="$(var.AutoClick_FirstBlood.TargetPath)" />
</Component>
Find the line of code that contains:
Manufacturer=""
In the quotes, type your name or your company name. Here, I type NhoLD (^.^)
Manufacturer="NhoLD"


6. Build the WiX project.


That's it. Now you have a working installer that installs and uninstalls the application.

Previous     Next

Chủ Nhật, 22 tháng 11, 2015

WiX toolset

I. Overview

WiX toolset - the most powerful set of tools available to create your Windows installation experience. Free and open source since 2004.

The WiX toolset is a set of tools that build Windows installation packages from XML source code. The toolset provides both a command line environment that developers may either integrate into their oldstyle Makefile build processes or use the newer MSBuild technology from inside integrated development environments like Microsoft Visual Studio or SharpDevelop to build their MSI and MSI setup packages.

WiX is open source project, originally developed by Microsoft and maintained by Rob Mensching.

The toolset is written in C# and requires the .NET Framework to run. However, this only applies to toolset itself. The installation packages you create with the toolset do not require any extra framework or software to be installed on the target computer. Similarly, there might be a few additional utilities required for some special applications (merge modules, patches) but only on your build computer, the client will only need the finished and self-contained installer package, nothing else.

II. Introduction


Finishing the development of an application is still far from ending it. During the recent years, users have learned to expect a full-fledged, complete setup solution bundled with your product---and as the setup is the very first part of the application the end user becomes acquainted with, the importance of its integrity and reliability cannot be overestimated.


Traditional setup tools used a programmatic, script-based approach to describe the various steps involved in the deployment of the application to be installed on the target machine: files to be copied, registry settings to be created, device drivers and services to be started. The technology behind Windows Installer, while it maintains a comparable look and feel for the end user, underwent important philosophical changes. The fundamental change was to move from the imperative description to a declarative one: rather than to describe the individual steps of installation, the declarative form specifies the state the target machine should be left in after various phases of installation and uninstallation. While the imperative description seems to be quite sufficient until some error occurs, the declarative one makes it possible to cope with unexpected conditions, differing target machine environments, aborted installations, shared resources. It is of paramount importance for setup developers to make sure that whatever happens during the process, the target machine should be left in a known, stable state, without introducing any detrimental side effects.


The developers of the widely used setup tools also embraced the new technology and started to offer new versions of their tools to create setup programs of this nature. However, as the experience of many developers shows, while these tools are perfectly capable of creating simpler installation packages, they often prove too limiting, inflexible when it comes to more complex requirements.


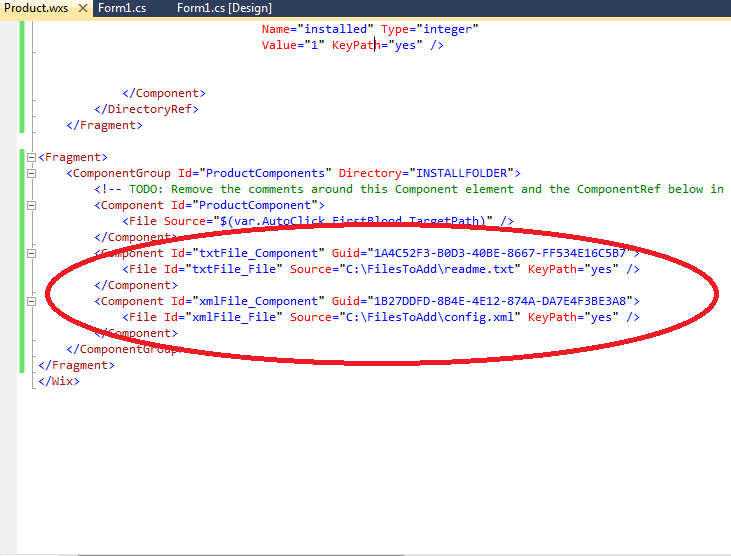
The toolset we are about to introduce, WiX, uses a different approach. Instead of a tool with a graphical interface that allows the developers to collect the files and other related tasks making up the installation process manually, it is much more like a programming language. Integrating perfectly with the usual process of creating applications, it uses a text file (based on the XML format) to describe all the elements of the installation process. The toolset has a compiler and a linker that will create the setup program just like our usual compiler creates our application from the source files. Therefore, WiX can be made part of any automated application build process very easily, be that based either on the classical technology of makefiles or the similar features of contemporary integrated development environments.


In addition to this integration, providing basically nothing more but developer comfort, WiX offers another level of integration, far more advantageous than the first one: the integration of the setup development process with that of the application. Traditionally, setup programs were only written when the main application had already been finished; often even by different developers. This approach requires a tedious and error prone process of collecting information about all the resources making up the application. While the files themselves are usually obvious, registry entries, services and most forms of inter-resource dependencies are often hard to reconstruct in a later stage: if solid development documentation is lacking, the setup developers have to collect all pieces of information from the original developers or try to extract it from the source code.


In an integrated application/setup development environment, the original developer should modify the WiX source files in sync with the application development. As soon as a new module has been started, a new registry entry, service or other dependency has been coded, the appropriate setup modification should be made in parallel. Using this approach, no important information will ever be lost and, as a bonus, the setup program will be practically finished together with the application itself.


As a consequence, WiX is not equally suited to all developers. The relatively steep learning curve (although our primary goal is to help overcome this difficulty with our tutorial) and the unavoidable exposure to the internal details and, sometimes, intricacies of the underlying Windows Installer technology suggest that less experienced developers or those who don't really need the unlimited and unparalleled performance WiX can offer might be better served by a simpler, GUI-based setup authoring tool, of which there are both commercial and freeware solutions available.


To summarize the features and advantages of the toolset:
  • declarative approach
  • unrestricted access to Windows Installer functionality
  • source code instead of GUI-based assembly of information
  • complete integration into application build processes
  • possible integration with application development
  • support for team development, both in-house and third-party
  • free, open source

You might wonder if WiX is already mature enough for the installation of large, complex applications with a large number of files to be deployed. Well, Microsoft itself uses WiX with all its major software packages. Just as an example, the setup of Microsoft Office was developed entirely with WiX.